Last Chance: Lock in $0.50/GB for Life - Price raises to $1 per GB on January 1!

How To Use Proxies With Tinder

Tinder is a social media dating app where users can swipe right on their phone if they like another user’s profile and swipe left if they dislike it. So here's a guide on how to install a mobile proxy server for it!

Carl Gamutan

by Carl Gamutan

Publishing Date: April 8, 2022


Tinder is a social media dating app where users can swipe right on their phone if they like another user’s profile and swipe left if they dislike it. Tinder matches potential couples with each other based on their attraction with one another. A tinder profile shows a user's photos, a short bio about them, and a list of their interests. To be able to message another user though, you both have to “swipe right” and match before you can talk to each other. If you’re a free user on Tinder though, then you will only be able to connect for 30 days and you can’t view profiles that aren’t from your country unless you subscribe to their premium packages.

For users who want to access a wider range of profiles or create multiple accounts, there is a solution that doesn't require subscribing to premium packages. By using a free proxy list for Tinder, you can bypass certain restrictions and even unblock Tinder if needed. Proxies shield your device's IP address, displaying only the proxy server's IP to websites and applications you connect to. This can help you overcome geographical limitations and create multiple accounts with different IP addresses. Additionally, rotating proxies can disguise the use of Tinder bots, making their requests appear as if they are coming from "real" users.

Users that want to create multiple accounts and automate Tinder functions such as liking, connecting and chatting with other Tinder users will be restricted by Tinder’s policies. There’s a limit to how many accounts you can create on a single IP and the use of Tinder bots are banned. To bypass these restrictions or have Tinder unblocked, then you will need the help of a Tinder proxy.

A Tinder proxy works the same way as a regular proxy in that it shields your device’s IP address from any website you visit or any application you use that connects to the internet. It will only be able to see the IP address of the proxy server and your own IP address will be protected. You can change the IP address the proxy server is using and even have it periodically change using rotating proxies. This means that any new Tinder account you create would have a different IP and also the fact that Tinder will not be able to recognize that you’re using bot automation since the requests from your bot would look like it comes from “real” users.

If you’ve been banned by Tinder and you’re asking how to get around a Tinder ban then proxies can also help you on this. You would be able to use a different IP address from your banned one so you would be able to have Tinder unblocked. Residential proxies are the best proxies to use as these types of proxies use actual residential IPs from actual devices making it almost impossible for any website to detect that you’re using a proxy.

Let’s set up a Tinder proxy server.

How To Use Proxies With Tinder

For Android:

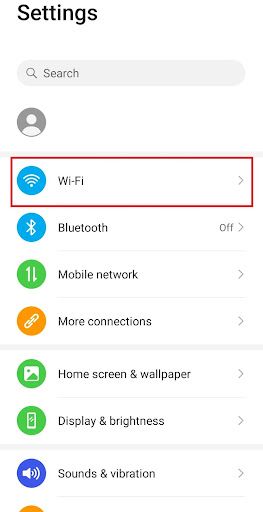
Step 1. Go to your phone’s settings app.

androidSettingsApp.jpg

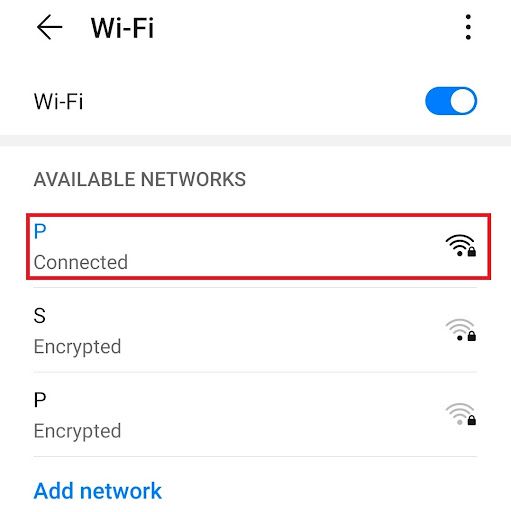
Step 2. Tap on “Wifi”.

androidWifiSettings.jpg

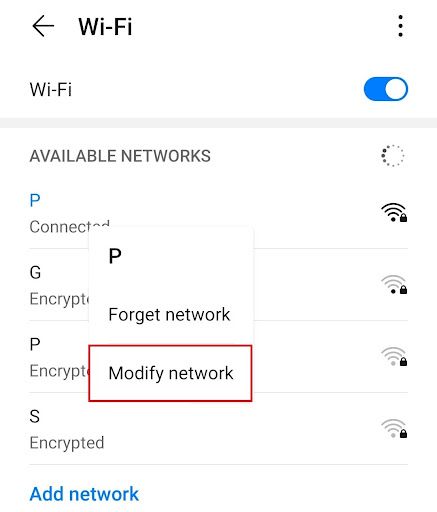
Step 3. Long-press the wi-fi network you want to use proxies with.

goingAndroidNetworkSettings.jpg

Note: Make sure to connect to the wifi first.

Step 4. Tap on “Modify Network”.

androidNetworkSettings.jpg

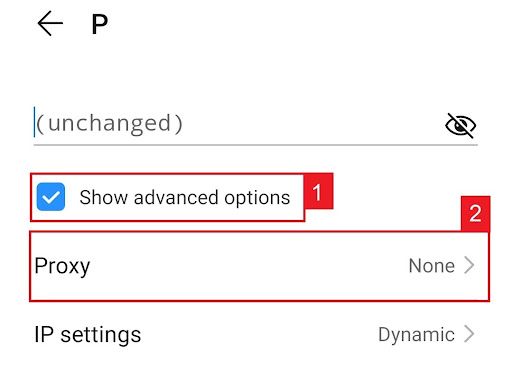
Step 5. Turn on “Show advanced options” and then click on “Proxy”.

androidProxySettings.jpg

This should then redirect you to your android device's proxy settings. Below is a detailed description of how to configure it.

Configuring Your Android Device’s Proxy Settings

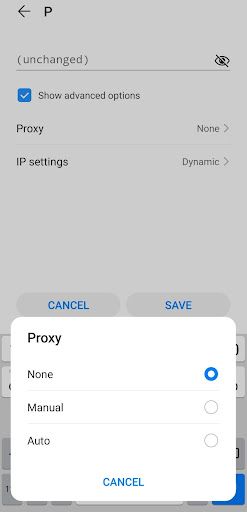
After being redirected to your phone’s proxy settings, you are then given two options to choose from: Automatic proxy setup or Manual proxy setup.

androidProxyDeviceSettings.jpg

If you want your device to utilize specific proxy server settings, choose the first option “Manual”. Choose the second option, “Auto”, if you want your device to automatically detect your proxy settings.

Note: Older android versions may not have the “Auto” option available.

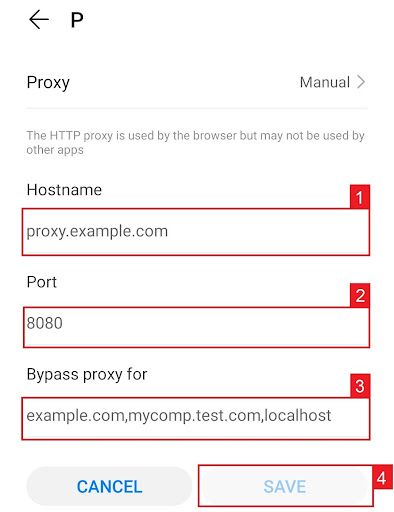
If you chose Manual configuration, then:

  1. Enter your proxy hostname
  2. Input your proxy port number
  3. Put any websites here that you don’t want to use any proxies on.
  4. Tap “Save” if you’re finished

androidProxyManualSettings.jpg

Note: You can enter hostnames or ip addresses here

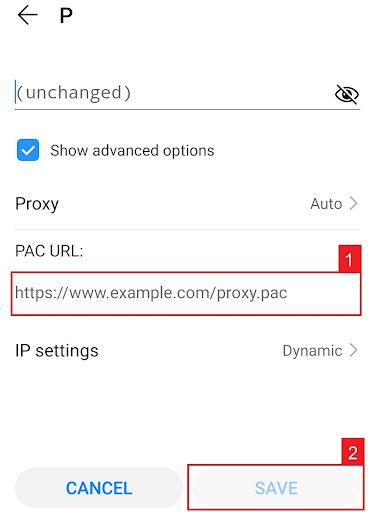
If you chose Auto configuration, simply:

  1. Enter your proxy service’s .PAC url.
  2. Tap “Save”

androidProxyAutomaticSettings.jpg

Note: Your service provider or network administrator will give you your required .PAC file.

For iPhone:

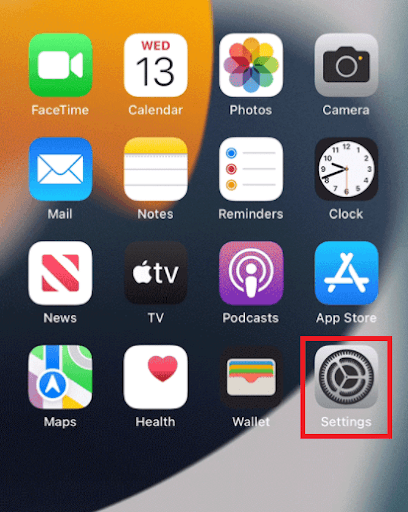
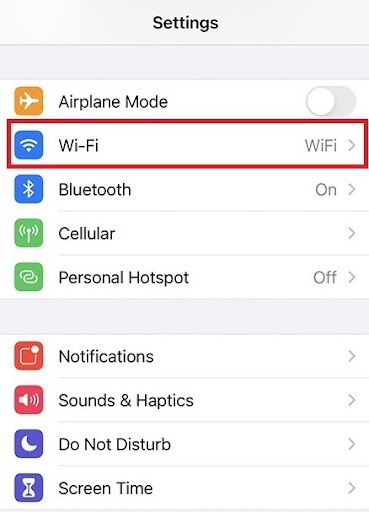
Step 1. Go to your Iphone’s Settings app.

iphoneSettingsApp.png

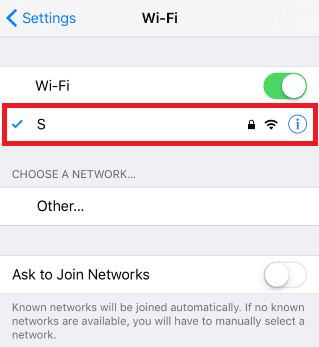
Step 2. Click on “Wifi”

iphoneWifiSettings.jpg

Step 3. Connect to the wi-fi network you want to use a proxy with and then tap on it again.

goingToIphoneProxySettings.png

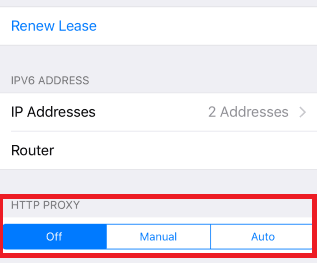
Step 4. Scroll down to the bottom and you will see the “HTTP Proxy” option

iphoneProxySettings.png

Configuring Your iPhone’s Proxy Settings

After being redirected to your iPhone’s proxy settings, you are then given two options to choose from: Manual proxy setup or automatic proxy setup. If you want automatic proxy detection for your proxy settings, choose the “Auto” option. Choose the “Manual” option if you want to utilize a specific ip address and port number.

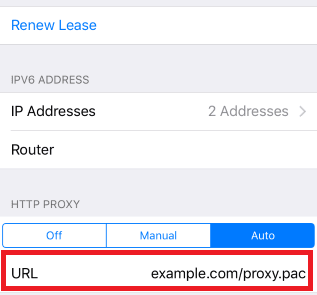
If you choose the “Auto” option, your iPhone will then immediately check if a proxy is needed for your current network before automatically configuring your proxy settings. Your iPhone will not use a proxy server if it deems it to be unnecessary, but if you really want to use one then simply obtain an automatic proxy configuration script, or a .PAC file for short, and enter it in the url section as seen below.

iphoneAutomaticConfiguration.png

Note: You can get a .PAC file from your proxy service provider or your network administrator.

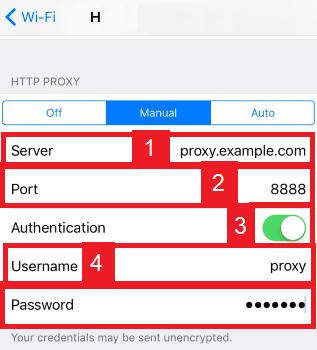
If you chose the “Manual” option then:

  1. Enter the server address or a IP address
  2. Enter the port number
  3. If your proxy provider says that authentication is required for the proxy server, then turn this on.
  4. Enter your authentication details

iphonesManualConfiguration.png

Congratulations! You have now finished configuring a Tinder proxy server.

Experience 10GB of Residential Proxies for $1
Claim my $1 trial